flippytale's STASHbusting (works in progress)

I am an artist, so I've started a lot of "good ideas" that have turned out to not be that at all. Some are still good, but I lost momentum by either getting bored with the work or distracted by a new more exciting idea. All of that is okay, but now so many of my UFOs are taking up space. It is time to clear the playing field.... (or be buried under a pile of partially sewn fabric)

Sunday, March 14, 2010

Eames Inspired Bed Quilt

Modern Shapes Bed Quilt:


Potential names:
something with "DNA" in it
something about evolving or a new strand of
the name has to be as personal as the design.


2009 When I got home after that retreat in 2007 and looked at the back I was heart broken to see that I had basted wrinkles into it. Finally last year I had the courage to take out the basting and the two pieces are waiting in my sewing room for a brave and open afternoon when I will baste it the was I always have, on my bed. I have another king size quilt that came out just fine.


11/11/2007 (Wow! I can't believe it has been since February that I worked on this last)

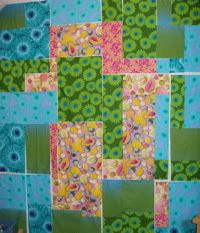
I arrived at our annual quilt retreat with the top and the two side boarders to finish, so I got to work on Friday:
Photo Sharing and Video Hosting at PhotobucketPhoto Sharing and Video Hosting at Photobucket
Once those two borders were finished and sewn on I realized that I had a big gap at the bottom and had to extend the bottom border so that it would be even.
Photo Sharing and Video Hosting at Photobucket
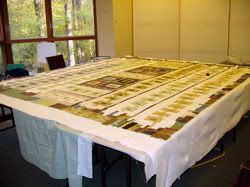
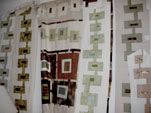
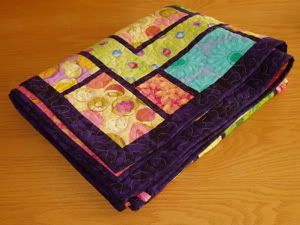
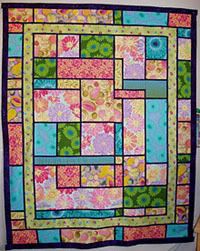
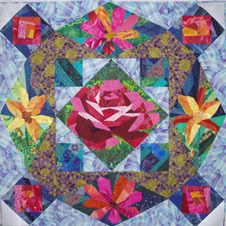
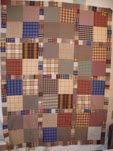
I finished the top just before dinner on Saturday and me and two of my friends took it outside to photograph it from the back stair case. It measures about 105 x 110 inches! A monster! Here it is hanging side ways:
Photo Sharing and Video Hosting at Photobucket

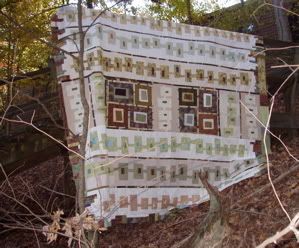
Can you see some of the lovely setting we had to work in?

So, after dinner is when the "real" quilters get busy. It is our last night and everyone wanted to sew on their projects. Myself included. I got busy with the back and managed to keep working on it until 1 am. I am such a pansy! Many of the other ladies were still going strong when I walked around to say good night. My roomie worked until 4:30 am!

Well, I woke up Sunday morning around 5:30 and realized I might have a chance to finish that back in time to baste the quilt before we had to leave at noon. So I got busy again. Just about everyone had stayed up late and were fast asleep when I crept out to my work space. I got the back finished just before breakfast! I had enough time to spread it out across 6 tables put together before I ate. I don't want to miss the meals because that is when I get a chance to chat with everyone and we do fun things through out the meal.
Photo Sharing and Video Hosting at Photobucket
Miracle, Miracle!
Several ladies volunteered to help me baste after breakfast and I worked on it steadily through the morning and just around noon I finished basting it. But, I couldn't have gotten it done with out so many wonderful friends to help me.
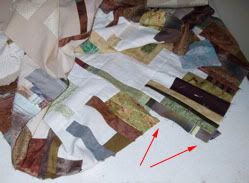
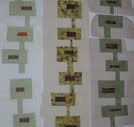
Here is what the back side looks like:
Photo Sharing and Video Hosting at Photobucket
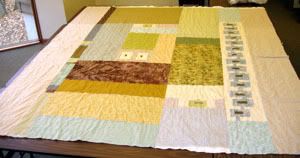
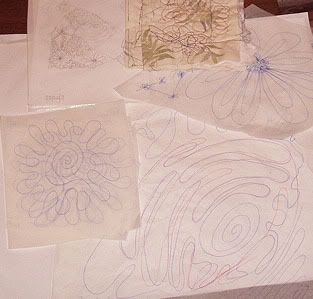
We basted a few wrinkles at the edges, but the center is together and that is where I will start quilting. So I will just adjust the errant basting later on. I've figured out the quilting for the long vertical sections, but not yet for the two center regions.
Photo Sharing and Video Hosting at Photobucket


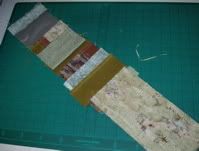
2/20/2007-I was busy this weekend putting together the last two strips and boarder, it is folded in quarters in this picture because it is too big to hang fully on my design wall. Right now it is about 100+ x 100+" (That should just about do it for size)
Photobucket - Video and Image Hosting

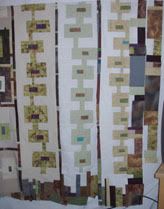
2/16/2007-put on a couple more strips, trying to confirm the final dimensions, how big the border should be..
what I found so far....
King Size
86"x92" to 110"x96"

Cal King Size
101"x86" to 110"x96"

Right now I have sewn the length already, about 105", but width is about 70" right now, so I need about 15-25" more inches for the width.

Had it on the bed to make measurements and Timon had to get up on it just after leaving the litter box. A close encounter, and luckily he didn't mess up the top, just my bedding... yuck! I would rather wash bedding than try to figure out how to clean a quilt top while it is still being sewn.

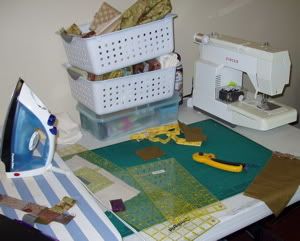
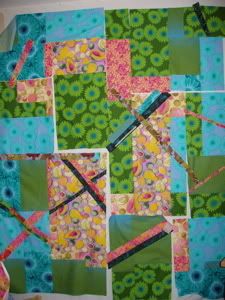
2/3/2007 - I am currently working, it is on the First layer of my design wall, but the rest of my life keeps interupting, love the colors, I want to work on it again, but have to remove the ones on top first.

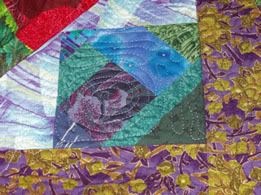
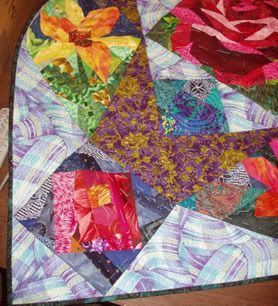
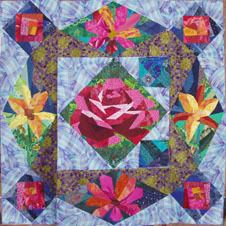
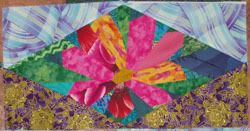
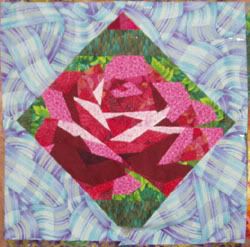
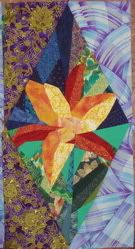
2005-2006 - I started it because to our guild's 2005-2006 President's Challenge: "Make the Quilt you have been wanting to make but keep putting off". So I dove in and got started. I had been collecting inpiration photos and fabric colors, I was very clear what my pallet would be.

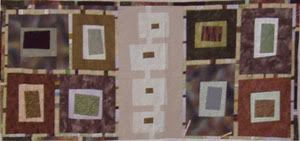
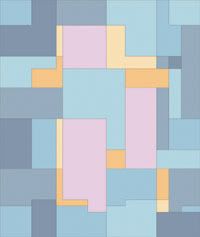
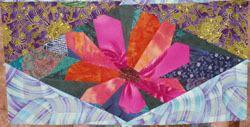
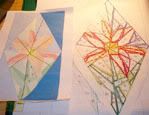
I can't say Eames in my only inpiration, but a lot of the graphics from the Mid-Century Modern furniture and fabric of the 1950's and Mod 1960's as well as contemporary sources. A common motif is the TV shape from this era that I really like
Here are some of my inspirations:
ANGELA ADAMS


EAMES


Denyse Schmidt


Photobucket - Video and Image Hosting


Photobucket - Video and Image Hosting


Photobucket - Video and Image Hosting


Timon has to "inspect"
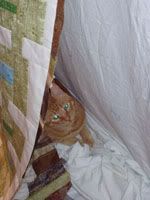
Photobucket - Video and Image Hosting

Labels: , , , , ,

Sunday, October 14, 2007

CRAZY Martha

10/23/2007

I have been doing my best to save this quilt top. It is nearly done. I added the criss-crosses and some "sashing". I am losing hope that this top can be saved, but am so close to finishing it.


10/14/07

I have been looking at this pinned on my wall for the last month and it just couldn't find excitement over it anymore, not the way the last quilt did. I realized it was just too regular and predictable. So, I put some of my crazy (and there has been a lot of it in me these days) into it and added something unexpected, and to bring some sanity to me. It, again, may not be my best work, but at least I like it better than I did a few days ago and it has gotten me to sew again.

I think I am a little more nuts when I am not sewing. I always feel a bit more stable when I am sewing, making a progression to some sort of completion. Finding some kind of sanity amongst the chaos, some small bit I can control and conduct.

I think I am calling it "Crazy Martha" because most of it made with Martha Negley Prints, and my part of crazy is making it.
Photo Sharing and Video Hosting at Photobucket

9/16/07
Whew! I did a lot this weekend, including sewing! I really like when I have good energy!

This is the pattern I created:
Photo Sharing and Video Hosting at Photobucket
And the results so far:
(I am feeling so smart, because I am using up the fabric left over from the other quilt! So far the green flowers and the purple fruit are all gone)
Photo Sharing and Video Hosting at Photobucket

9/15/07

As I was finishing my other quilt up I started to get an idea for this. Similar to the other but without the purple "sashing". I am bothered that viewers keep seeing a stained glass since that was not my intention.

It is roughly based on this design:
Photo Sharing and Video Hosting at Photobucket

....and surprise, surprise. While I was cutting out the pieces for this one I got another idea for the next one. So, I will have to start drafting it too.

Labels:

Sunday, October 07, 2007

Modern Quilt with Amy Buttler, Valorie Wells & Friends Fabrics

10/7/2007

I put a label on and finished the binding. Tied off the last of the quilting and pulled all the basting stitches out. It is going on my bed at retreat this November.
Photo Sharing and Video Hosting at Photobucket

All the rest of my process is here
Finished

Photo Sharing and Video Hosting at Photobucket

Labels:

Saturday, September 15, 2007

100 Yard Stash Bust 2006

Whoo-Hoo! I just added up how much fabric I used on this quilt and the last on and I surpassed my goal for this year buy more than double!!!!
Photo Sharing and Video Hosting at Photobucket

So, I reset the ticker to "0" and will do it again for 2007.

Now, can I finish any actual quilts????

Tuesday, June 26, 2007

Lone Star Quilt

6/26/2007

Here is the center that I completed at retreat, it is about 60" square. I am still thinking of what to do for the border. I decided to put the bright yellow at the tips to make it glow. The background fabric was picked from another project that I had with me. I couldn't have planned that it would be the background until my star points were done. But, don't the yellow points match perfectly with the lettuce leaves? I am thinking of calling it "Loose Leaf Lettuce".

One of our guild members taught us how to make a lone star, and naturally I had to go for the gigantic size, then I can make it into a bed quilt. She is a really good teacher because many of us had some issues with our project, mine was all slanty and off of the 45, and she could help us correct each problem with ease. Overall it was a great weekend.

Photo Sharing and Video Hosting at Photobucket

6/21/2007

Tomorrow I leave for a three day quilt retreat. It is a small group of us, just us board members from our guild. I can't wait! And, I am so not prepared, I haven't packed a thing! I am so glad I picked out the material for our class already. It will be a lone star pattern. Now I just have to finish my day of work and gather up all my quilting accoutrements so I can have FUN the next three days.

Here is a mockup of what it might look like when I get done....
I took pictures of my fabric and imported them into Adobe Illustrator to create this little picture
Photo Sharing and Video Hosting at Photobucket

Labels:

Friday, June 08, 2007

HTML Table for UFO Tracking

I like HTML code, it is simple to rewrite, though a bit primitive compared to all the other fancy web editing programs out there. I and saw a table on Sewprimitive Quilting and really think it would be great for tracking my UFOs, I am putting it here and plugging in my own projects to see if it works. If it does then it may eventually reside on my side bar.


STATUS OF MY UFO's


  Project Block Top Sandwich Quilting Binding Status
01) Blue Geometric X  


Wednesday, June 06, 2007

Storm at Sea Challenge Quilt

STORM AT SEA CHALLENGE - For for our guild challenge that requires using the "Storm at Sea" block and the theme "Blooms & Birds". Deadline: March 27th, 2007 (Actural journal about this quilt is on my regular blog)

I got the idea to make the block the same size of the quilt. The flowers were modified from Ruth McDowell's book "Pieced Flowers" to fit my block sizes.

August 2007
My quilt was shown in Nashville as part of our guild group challenge.
Photo Sharing and Video Hosting at Photobucket

3/26/2007
Some Technical Notes:
PS, I didn't actually stitch through the tissue paper, I used it to "trace it to memory" a few times before I stitched the real thing. I also had a practice piece that I do a few warm ups on before I got started each time.

Upper Left is an overall sketch, Upper Right is the nub I would practice sewing on, Below are the tissue drawings of how I wanted to quilt.
Photo Sharing and Video Hosting at Photobucket

3/23/2006
Final Push:
The only parts left on my Quilt are

-Quilt the Corner Blocks
-Quilt the Cosmos Blocks
-Quilt the Daylily Blocks
-Quilt the Center Rose
-Embellish above with some clear and gold beads in the centers
-Sew sleave on
-Print & Sew on Label

some sketches of my quilting ideas:


3/21/2007
Stipple quilted the background areas, only the blocks of flowers left to do. Sewed on the binding and just moments ago put my final stitch in on that.

Binding Making Progress:
Photo Sharing and Video Hosting at Photobucket
Free-motion Quilting in background:
Photo Sharing and Video Hosting at Photobucket
Only part to quilt are the flowers:
Photo Sharing and Video Hosting at Photobucket

3/12-3/15
I ripped out stitches from the center so that I could add the center corner blocks. Once it was reassembled I added the two outer sides, I discovered I had sewn the to outside panels on upside down! Bleah!!!


I sewed the two side panels on correctly it was worth the effort. I began sketches of quilting strategy, make the sandwich and get started with the final leg
Photo Sharing and Video Hosting at Photobucket

2/10-
Almost done, but I don't like how big the blue corners are in the center, love how the outside corners came out. Means some stich ripping (un-sewing) if I change the center. In the mean time I pinned what might work on the right side of the center. Better with less light blue, I think, but even better after a late lunch.
Photo Sharing and Video Hosting at Photobucket

12/13/06-
I drafted the left and right sides to look like Day Lilies, the top and bottom are Cosmos, and the center is a Rose. All of these flowers were modified from Ruth McDowell's book "Pieced Flowers" to fit my design. So, does that still make that my design, I guess that the overall is, but maybe not the details.

Not sure what I will do in the corners yet. Would like to put a hummingbird in there somewhere too. I am using colors from my scrap bag to piece the backgrounds of the flowers!
Photobucket - Video and Image Hosting


Photobucket - Video and Image HostingPhotobucket - Video and Image HostingPhotobucket - Video and Image Hosting

Photobucket - Video and Image Hosting


This is what the overall block looks like....
Photobucket - Video and Image Hosting

Some of my patterns and Work in Progress...

Cut pieces layed out, ready to be sewn together (I think is the best part)
Photobucket - Video and Image Hosting

Cutting fabric with Freezer Paper pattern
Photobucket - Video and Image Hosting

Adobe Illustrator sketch
Photobucket - Video and Image Hosting

Printout, trased onto freezer paper, colored, some lines are modified
Photobucket - Video and Image Hosting

The Center Rose before I cut it to fit my Design
Photobucket - Video and Image Hosting

Started November, 2006

Labels: ,